The Sushi Tails: Perfect Sushi At Home
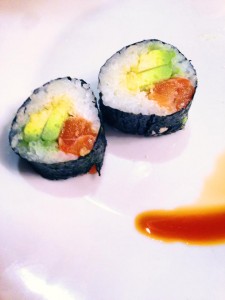
Every tale should have a happy ending, and fortunately this one is no exception. On my latest attempt to make perfect restaurant quality sushi at home my kids declared that my journey had ended successfully. My sushi was the best sushi they had ever tasted! Now, while I know my taste-testers might be a little subjective I have to admit the sushi is pretty darned good. And… I can make it at home for about a quarter of the price that I can get it at any restaurant. This is certainly as much as I’d hoped to accomplish from the outset and more! So give it a try and let me know how yours comes out. My kids favourite was maki with salmon, avocado, carrot, cucumber, crispy bits (crushed Panko bread crumbs) and lightly spiced mayo.
Materials:
A small investment in some critical tools will make sure your sushi making experience at home goes off without a hitch. As I mentioned in my earlier post about sushi ingredients: you’re already saving a ton of money by making sushi at home. Make sure you have the right tools to make it a great experience and the freshest ingredients so that you can become a super sushi-making home chef.
The Magic Ratios:
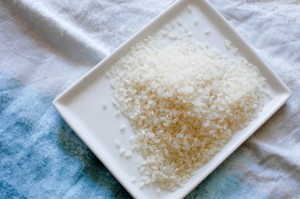
After a LOT of experimenting with varying amounts of water, rice and vinegar here’s what i came up with for perfect sushi rice at home.
x grams dry sushi rice
x * 1.10 ml water
x * .25 ml seasoned vinegar
For example:
500 grams dry sushi rice
550 ml water
125 ml seasoned vinegar
Perfect Sushi at Home
Serves 5-6
Ingredients:
1000 g quality sushi rice (such as Kokuho)
1100 ml water (the magic ratio is 10% more water in ml than rice in grams)
250 ml seasoned vinegar (the magic ratio is 25% vinegar in ml than your dry rice was in g)
20 nori sheets
1 peppers, julienned
1 English cucumber, seeded and julienned
1 carrot, julienned
3 tablespoons Japanese bread crumbs
4 oz sushi grade salmon, skinned and de-boned, cut into narrow strips
6 dried shiitake mushrooms
1 tablespoon hot water
2 tablespoons soy sauce
1 tablespoon maple syrup
4 tablespoons spicy mayo
Preparation:
- In a small bowl mix together the soy sauce, hot water and maple syrup. Add in the dried mushrooms and allow them to rehydrate. Once rehydrated cut them julienne.
- Place the rice in a large bowl and rinse with ice cold water. Swirl the rice with a paddle a few times to remove the starch. Drain the water away. Repeat this process until the water rinses clear – about five times.
- Put the rice and the measured amount of water into a rice cooker and set to manufacturers setting for white rice.
- Transfer the rice to a large, wide wooden bowl. Pour the seasoned vinegar over the rice and using a paddle mix the rice being careful to chop with the side of the paddle and then lift the rice to turn. The trick here is not to mush the rice together but rather to chop between the grains of rice, allowing the vinegar to incorporate.
- Once the vinegar is incorporated continue to mix and begin to fan the rice. Take care again not to press the rice together but rather to gently chop and fold. You want to cool the rice to about body temperature. Do not cool entirely to room temperature.
- If you are not making sushi straight away, cover the rice with a clean dampened tea towel to stop it drying out (prepared sushi rice will keep at room temperature for up to 4 hours.) Do not refrigerate!
- Before assembling your sushi place a small bowl of water nearby to dip your fingers in. This will keep the rice from sticking to your hands.
- Cover your bamboo mat with plastic wrap to prevent rice from sticking to it. Position nori sheet shiny side down on your bamboo mat.
- Dip hands in the water mixture and grab a small handful of sushi rice. Cover bottom three-quarters of nori sheet with thin layer of rice, leaving the top quarter of the sheet empty.
- Layer a thin layer of fillings on top of rice on the bottom third of the nori sheet. Add a sprinkling of breadcrumbs or spicy mayo if desired.
- With a wet finger lightly moisten the exposed strip of nori at the top of the sushi roll (this will seal it together when rolled.)
- Begin rolling your sushi roll by pushing the mat forward until the mat is completely around the sushi roll and until the top and bottom edges of the nori meet. The mat can be used to shape your sushi but don’t press too hard.
- Set your first sushi roll on a plate. Make as many additional rolls as you like. To cut use a very sharp knife, slicing each roll into six equal pieces. Wet the knife in water between rolls. Enjoy!
Filed under: Compilation, Method, Recipe on January 27th, 2014


