The @Phenom1984 Lafayette Coney Island Burger
DSC_1142 copy

When I heard our friend Mike (@phenom1984) and his boys were coming for a visit this summer I knew it was time to roll out another “twitter-handle sandwich.” I’ve already whipped together a bunch of these as you may know

Mike comes from Detroit, MI and and they are hardcore sports fans. Now if you are not from Detroit you likely don’t  know of one of their most famous eats: the Coney Island Dog. A Detroit Coney starts with a grilled hot dog which is covered in mustard, diced onions, and “Coney sauce.” Two neighbouring shops in the downtown core, American & Lafayette, duel over who has the better  version of this Motor City classic. Mike confirmed what I had heard: Lafayette takes it hands down thanks to their awesome Coney sauce.

I decided I couldn’t possibly try and take this classic dish head on, so opted for a little spin on the original. So, here is The @Phenom1984 Lafayette Coney Island Burger. Sloppy, messy, delicious.

Lafayette  Coney Island Burger


The @Phenom1984 Lafayette Coney Island Burger
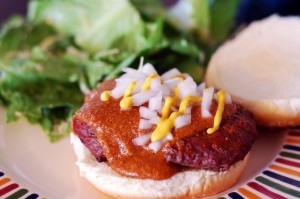
Serves: 8

Ingredients:
2 white onions, diced
1 tablespoon vegetable oil
250 grams ground beef
150 grams smoked meat, diced
150 grams all-beef hot dog, diced
2 cups beef stock
1 tablespoon chili powder
1 tablespoon paprika
1 teaspoon cumin
1 teaspoon tumeric
1 cup canned crushed tomatoes
2 tablespoons cornstarch
Salt & pepper, to taste
8 1/4 lb hamburgers
8 hamburger buns
Yellow mustard, for serving

Preparation:

  1. Place chopped onion in a bowl of ice water to reduce sharpness. Cover with plastic wrap and place in fridge until ready to use.
  2. Heat the oil over medium high heat in a medium sized pot and brown the ground beef until no longer pink. Add smoked meat and hot dogs and heat for 2 minutes.
  3. Add stock, spices and tomatoes and stir to combine. Heat until it comes to a simmer.
  4. Use an immersion blender to blend until the sauce has the consistency of a Bolognese sauce, about one minute. Season with salt and pepper, to taste.
  5. Place cornstarch in a small bowl. Add 2 tablespoons cold water and stir until a smooth paste forms. Whisk into the hot, simmering Coney sauce to thicken. Bring to a boil and simmer for an additional 5 minutes.
  6. Grill hamburgers over high heat to you liking.
  7. Serve hamburgers on bun. Ladle a generous amount of Coney sauce on top and finish with onions and mustard. Enjoy!

Grilled Peach Trifle with Lemon Buttermilk Cake

Grilled Peach Trifle with Lemon Buttermilk Cake


Having spent the better part of the last 20 years grilling, it isn’t always easy to surprise me with something new or innovative on the grill. So when I heard that chefs Michael Allemeier, Devan Rajkumar and Richard Julien were teaming up with Dairy Farmers of Canada to launch a series of easy and unique grilling recipes featuring cream I was intrigued to say the least!

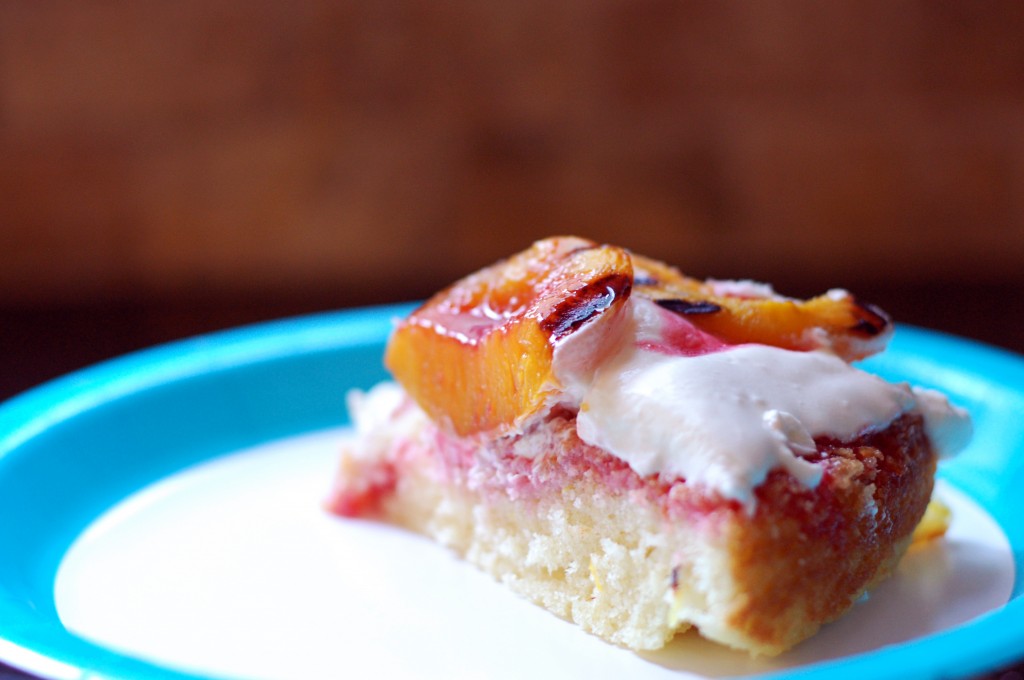
Each chef developed two recipes that can be found at www.AnyDayMagic.ca including this delicious dessert developed by Chef Allemeier. I baked a nut-free version of the cake and really loved the use of fresh lemons, raspberries and peaches in the recipe. The cake was gobbled up by my kids and their friends as quickly as I cut it. The sweet caramelized peaches go perfectly with the slight tartness of the raspberry syrup and lemon in the cake. The whipped cream ties the whole thing together with a cool, velvety finish that puts this whole dessert over the top.

Grilled Peach Trifle with Lemon Buttermilk Cake Slice

Grilled Peach Trifle with Lemon Buttermilk Cake

Prep Time: 30 mins; Cooking Time: 35 – 40 mins
Serves: 8 to 12
Recipe by chef Michael Allemeier

Ingredients:

4 to 6 freestone peaches, cut in half and pitted

Lemon Buttermilk Cake:
1 cup granulated sugar
1/2 cups butter, room temperature
1 tsp vanilla
2 eggs
1 1/2 cups all-purpose flour
1/4 tsp each, baking soda, baking powder and salt
6 tbsp buttermilk
1 lemon, zest finely grated and juiced (about 3 tbsp)

Raspberry Syrup:
2 cups fresh raspberries
1/2 cup each, granulated sugar and water
1 tsp lemon juice

Whipped Cream:
1 1/2 cups 35% cream
1/4 cup icing sugar
1/2 tsp vanilla

Preparation:

  1. Lemon Buttermilk Cake: Pre-heat oven to 325°F (160°C). Lightly butter a 10-inch (25 cm) non-stick springform pan; line bottom with parchment paper. Set aside.
  2. In a large bowl, using an electric mixer on medium speed, beat together sugar, butter and vanilla, until creamy and smooth. Beat in eggs, 1 at a time.
  3. Sift flour, baking soda, baking powder and salt into a small bowl. Reduce speed to low and slowly add the flour mixture, alternating with the buttermilk until well mixed. Add lemon zest and juice; mix well. Spread into the prepared pan; smooth top.
  4. Bake for about 35 to 40 minutes until tester inserted in center comes out clean. Let cool in pan on rack for 10 minutes. Carefully remove from pan and cool on rack completely.
  5. Raspberry Syrup: In a medium saucepan, combine raspberries, sugar, water and juice; bring to a simmer on high heat, stirring frequently. Reduce heat to medium and simmer 5 minutes or until raspberries are completely broken down. Strain through a fine meshed sieve, pressing on berries to extract juice. Discard seeds and refrigerate syrup to cool completely.
  6. Preheat grill to medium-high heat. Place peaches cut side down on greased grill; grill covered for 3 to 4 minutes or until grill marks appear. Turn peaches over and grill 1 to 2 minutes longer. Cool to room temperature or up to 6 hours.
  7. Whipped Cream: In a chilled bowl, whip cream, icing sugar, and vanilla extract until stiff peaks form.
  8. To assemble: On a serving platter, place cake. Drizzle with 3/4 cup (175 mL) of the raspberry syrup. Spread cream to the edges. Place grilled peach halves on top. Drizzle remaining raspberry syrup. Serve immediately. Enjoy!

Tips

  • Prepare components of this recipe ahead and when ready to enjoy, whip cream and assemble.
  • The Lemon Buttermilk Cake keeps well for several days, wrapped well in plastic wrap and stored at room temperature.
  • If fresh peaches are not available, substitute canned peach halves, well drained.

Ontario Craft Beer Smoked Beef Ribs

OCB1
I recently went for an Ontario Craft Brewers Association (OCBA) Tour. Aside from tasting some absolutely marvelous beers, we also learned a lot about what goes into making some of Ontario’s smaller beer batches. The OCBA strictly adhere to ‘craft brewing’ quality guidelines, ensuring no additives or preservatives are added to their beer.
We had a fascinating afternoon with delicious samplings along the way.
OCB2
At the Old Credit Brewery we were charmed by owner Aldo and his love of European styled ice beer. Old Credit makes the only such beer in North America and offers up three beverages, each more tasty than the next.
Great Lakes Brewery offered samples of some “virgin” Golden Horseshoe wort (beer before fermentation has begun), and then walked through a tasting of their brand’s offerings. Lastly, we stopped by an old favourite of mine, the Granite Brewery. While their ales are only available on-site or in take-away growlers it’s worth the trip to taste their Ringberry Ale. A raspberry flavoured beer unlike anything you’ve likely tried before.
For $65 and up you can go for a similar trek around one of the routes provided by the OCBA Tours: Downtown Toronto, Oakville/Mississauga or Kitchener/Waterloo. Highly recommended!
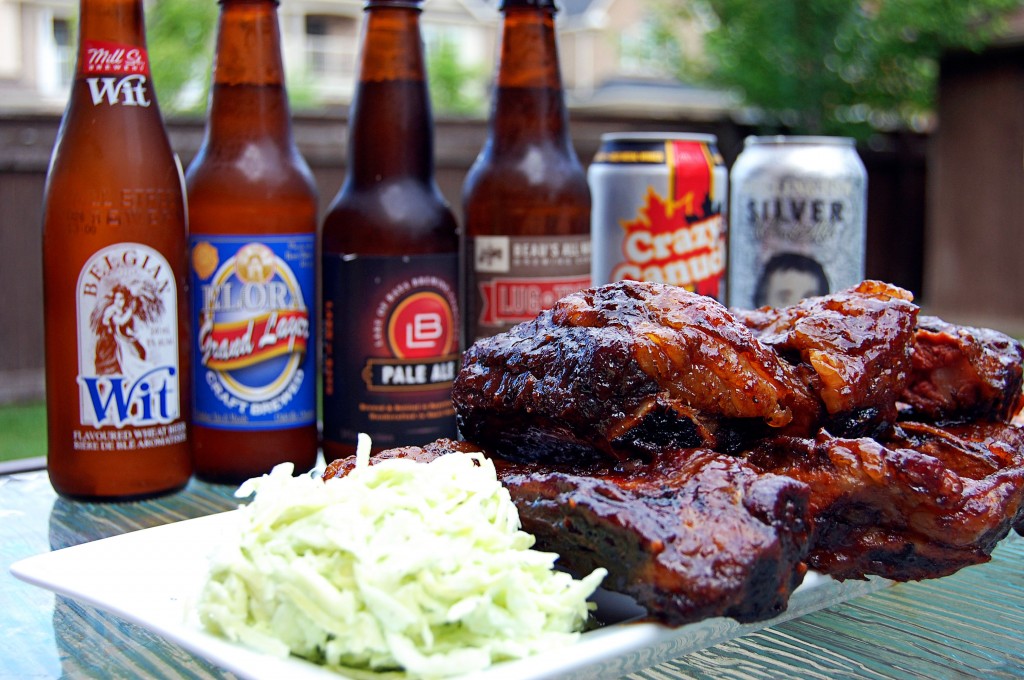
My recipe below is perfect to try with your own favourite Ontario Craft Beer. As a key component in both the marinade and the mop sauce, you’re going to be a backyard BBQ hero when you serve these bad boys up alongside a frothy glass of craft brew. Give them a try this summer and let me know what you think!
OCB3

************************************************************

Ontario Craft Beer Smoked Beef Ribs

Serves: 4
Ingredients:
1 cup tomato sauce
1/4 quarter cup of cider vinegar
2 tablespoons molasses
2 racks of beef ribs
1 cup of your favourite wood-chips, for smoking (I used Pecan wood)
Marinade:
1/2 cup brown sugar
700ml of craft beer
2 tablespoons soy sauce
2 tablespoons Worcestershire sauce
1 tablespoon chopped garlic
1 teaspoon black pepper
Preparation:
  1. Heat the marinade ingredients in a small saucepan. Bring to a boil and completely dissolve the sugar. Allow to cool.
  2. Remove thin layer of membrane from the back of the ribs.
  3. Slice into the meat between each rib, but do not cut all the way through. This will help them absorb your marinade.
  4. Place the ribs in a large roasting pan or plastic bag and add cooled marinade to them. Allow to marinate overnight. Flip and rearrange from time to time so that the ribs marinate evenly.
  5. Remove the slab of ribs (saving marinade) and pat dry.
  6. Put the marinade in a saucepan and bring to a boil, reducing by half. Add tomato sauce, cider vinegar, and molasses and continue to simmer until thickened (by about half again).
  7. Soak the wood chips in a bowl of water for about 30 minutes.
  8. Put a handful onto the middle of a sheet of heavy duty aluminum foil. Fold all ends of the aluminum foil together to make a pouch. Turn the pouch over and poke about 10 holes in the bottom of the pouch with a fork.
  9. Lift the grate on one side of the grill and insert the pouch over a burner shield.
  10. Light the side of the grill with the wood pouch and turn it to Medium-Low heat. When the pouch starts to smoke, you are ready to grill. Keep the lid closed as much as possible to allow for the smoke to circulate around the meat.
  11. Place ribs bone-side down on unheated side of the grill and smoke at about 225°F for 2 1/2 hours (adjust heat control as necessary to keep temperature steady). Flip the ribs over and smoke for an additional 30 minutes.
  12. Brush ribs liberally with half of the sauce.  Flip and smoke bone side down for another 30 minutes.
  13. Turn grill to High and grill ribs for a few minutes to sear. Remove ribs from the grill, cut into individual ribs and brush them one more time with sauce.