The Sushi Tails: Perfect Sushi At Home
sushi

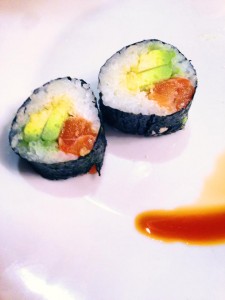
Every tale should have a happy ending, and fortunately this one is no exception. On my latest attempt to make perfect restaurant quality sushi at home my kids declared that my journey had ended successfully. My sushi was the best sushi they had ever tasted! Now, while I know my taste-testers might be a little subjective I have to admit the sushi is pretty darned good. And… I can make it at home for about a quarter of the price that I can get it at any restaurant. This is certainly as much as I’d hoped to accomplish from the outset and more! So give it a try and let me know how yours comes out. My kids favourite was maki with salmon, avocado, carrot, cucumber, crispy bits (crushed Panko bread crumbs) and lightly spiced mayo.

Materials:

A small investment in some critical tools will make sure your sushi making experience at home goes off without a hitch. As I mentioned in my earlier post about sushi ingredients: you’re already saving a ton of money by making sushi at home. Make sure you have the right tools to make it a great experience  and the freshest ingredients so that you can become a super sushi-making home chef.

The Magic Ratios:

After a LOT of experimenting with varying amounts of water, rice and vinegar here’s what i came up with for perfect sushi rice at home.

x grams dry sushi rice
x * 1.10 ml water
x * .25 ml seasoned vinegar

For example:
500 grams dry sushi rice
550 mwater
125 ml seasoned vinegar 

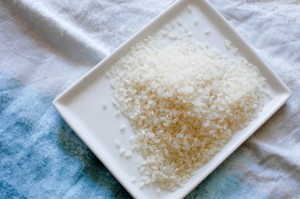
Sushi Rice

Perfect Sushi at Home

Serves 5-6

Ingredients:

1000 g quality sushi  rice (such as Kokuho)
1100 ml water (the magic ratio is 10% more water in ml than rice in grams)
250 ml seasoned vinegar (the magic ratio is 25% vinegar in ml than your dry rice was in g)
20 nori sheets
1 peppers, julienned
1 English cucumber, seeded and julienned
1 carrot, julienned
3 tablespoons Japanese bread crumbs
4 oz sushi grade salmon, skinned and de-boned, cut into narrow strips
6 dried shiitake mushrooms
1 tablespoon hot water
2 tablespoons soy sauce
1 tablespoon maple syrup
4 tablespoons spicy mayo

Preparation:

  1. In a small bowl mix together the soy sauce, hot water and maple syrup. Add in the dried mushrooms and allow them to rehydrate. Once rehydrated cut them julienne.
  2. Place the rice in a large bowl and rinse with ice cold water. Swirl the rice with a paddle a few times to remove the starch. Drain the water away. Repeat this process until the water rinses clear – about five times.
  3. Put the rice and the measured amount of water into a rice cooker and set to manufacturers setting for white rice.
  4. Transfer the rice to a large, wide wooden bowl. Pour the seasoned vinegar over the rice and using a paddle mix the rice being careful to chop with the side of the paddle and then lift the rice to turn. The trick here is not to mush the rice together but rather to chop between the grains of rice, allowing the vinegar to incorporate.
  5. Once the vinegar is incorporated continue to mix and begin to fan the rice. Take care again not to press the rice together but rather to gently chop and fold. You want to cool the rice to about body temperature. Do not cool entirely to room temperature.
  6. If you are not making sushi straight away, cover the rice with a clean dampened tea towel to stop it drying out (prepared sushi rice will keep at room temperature for up to 4 hours.) Do not refrigerate!
  7. Before assembling your sushi place a small bowl of water nearby to dip your fingers in. This will keep the rice from sticking to your hands.
  8. Cover your bamboo mat with plastic wrap to prevent rice from sticking to it. Position nori sheet shiny side down on your bamboo mat. 
  9. Dip hands in the water mixture and grab a small handful of sushi rice. Cover bottom three-quarters of nori sheet with thin layer of rice, leaving the top quarter of the sheet empty.
  10. Layer a thin layer of fillings on top of rice on the bottom third of the nori sheet. Add a sprinkling of breadcrumbs or spicy mayo if desired.
  11. With a wet finger lightly moisten the exposed strip of nori at the top of the sushi roll (this will seal it together when rolled.)
  12. Begin rolling your sushi roll by pushing the mat forward until the mat is completely around the sushi roll and until the top and bottom edges of the nori meet. The mat can be used to shape your sushi but don’t press too hard.
  13. Set your first sushi roll on a plate. Make as many additional rolls as you like. To cut use a very sharp knife, slicing each roll into six equal pieces. Wet the knife in water between rolls. Enjoy!

The Sushi Tails: The X Factor

WrWings

On this quest to make sushi rice at home I thought it would be a good idea to enlist the help of some professionals. When I told my friend (who we’ll simply call Chef Jonathan to protect the innocent) about this little sushi-making project I’m on, he was super excited to get me in the kitchen so we could cook sushi rice together. Now, Chef Jonathan is a professional Executive Chef who has done an apprenticeship in New York City for 3 months at the famed Nobu restaurant. For those who know a thing or two about sushi, Nobu is about as authentic and high-end of a sushi experience that you will find outside of Japan. So while Jonathan was not technically allowed to make the sushi at Nobu (it takes years of training before they will even let you touch the rice, never mind the sushi!) he certainly picked up a thing or two watching some of the master sushi chefs in action.

We started off talking about a lot of the details of making sushi that I’ve already documented in this series — the use of fine ingredients; the ratio of water to rice; the importance of fanning, chopping, and folding. As Chef Jonathan poured the sushi rice into his pot, and was about to add the water he suddenly stops, spins to me and says excitedly “I nearly forgot the secret ingredient! Follow me!”

He then beckons me to follow him through the busy kitchen of chefs and boiling pots, past the supply galley and linen cabinet, along a dimly lit back hallway between the laundry piles and rusting furnace to an open pantry closet with its door hanging askew. At this point I felt a little bit like Mr. Peltzer following Mr. Wing’s grandson through his shop to buy a Mogwai… Chef Jonathan reaches to the back of one of the shelves and pulls out a large black gold can with Japanese writing up and down the sides. “Miora!” he says beaming with delight. “The secret ingredient of sushi restaurants.”

While there are plenty of Japanese instructions and explanations printed all over the can the English label slapped on top for export purposes looks like it was printed on a dot matrix printer from 1990 and simply says:

Powdered Ferment, Miora Gold
Ingredients: Natural Amylase, Irotease, Starch, Glucose
For Professional Restaurant Use Only
Keep Refrigerated

Chef Jonathan explains that the powder helps the rice from becoming too gloopy and makes sure it is just the right right consistency. I take a look at the fine powder in the tin he’s just popped open and I have my suspicions. “Two teaspoons of Miora per one cup of rice.” says Chef Jonathan. ‘Two heaping teaspoons of skeptical’ I think to myself… Before leaving I made sure Chef Jonathan gave me some of his secret powder to take home with me to experiment with. When I got home I popped the Miora in the fridge and headed straight to my computer to do some research.

It turns out Miora became an additive to sushi rice sometime shortly after World War II.* From a chemical point of view Amylase helps break starch into glucose, while Protease breaks protein down into amino acids. Effectively the Miora’s Amylase helps generate sugar in its simplest state (read: brain candy) and the amino acids help create that elusive taste of umami. Many Miora powders also contain MSG. So essentially sushi restaurants are converting your rice into the sushi equivalent of crack-cocaine. Sweet, salty, sour, and umami  in the rice combined with more salt and umami from the soy sauce and fish, in addition to the bitterness of the wasabi… and effectively this combines to get your palate and brain craving the stuff again and again. What restaurants have stumbled upon is a way to get you hooked on their food. Your brain succumbs to thousands of years of evolution simply content in the fact that all indications point to the fact that this sh!t is GOOD!

Long story short, Miora is likely used in many (read: most? all?) of the sushi restaurants you visit. It’s a way they can make sure their sushi ‘pops’ in flavour and is highly addictive, keeping you coming back for more. It’s made in a lab and certainly has some suspicious ingredients you wouldn’t assume are going into sushi — one of the simplest of natural foods. Some varieties of Miora contain MSG — a whole other post we can get into some other time…Whether it also helps with the consistency of the rice, as Chef Jonathan claims, I can not say for sure. However, if I’m making sushi at home for my family I want it to be as healthy as possible. Whatever the benefits of Miora might be for large sushi establishments it is certainly the X Factor I don’t mind skipping out of any sushi I’m going to make at home!

* from The Story of Sushi by Trevor Corson

The Sushi Tails: Materials

Sushi Materials

If we’re going full steam ahead (pun intended) with this idea of making sushi at home we’ve got to make sure there are some basic items on hand. You can certainly make use of whatever you’ve got on hand so long as it’ll do the job. For example, a two-pocket school portfolio makes a wonderful fan in a pinch.

So here are the basics of what you’ll need:

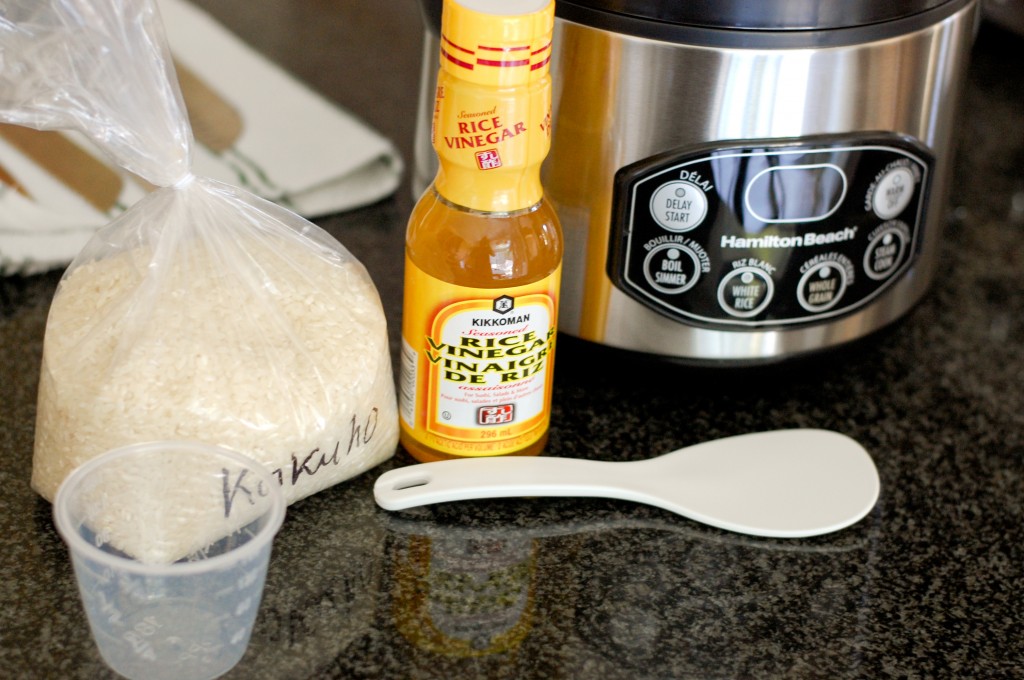
Rice Measuring Cup

If you’re using a rice cooker odds are it came with a rice measuring cup, but to clarify – rice has its own standardized measuring system and any other measuring tools you have in your kitchen may say one cup on them… but they don’t mean one cup of rice. Its believed the original measurment is based on the size of a Japanese sake bottle which is clearly not the same as a standard kitchen measuring cup. That’s really important if you’ve got a rice cooker as many of them have lines to mark how much water to pour in to the cooker that correspond to the number of “cups” of rice you add.

That being said, I believe the end result of this month-long rice experiment is that we are going to veer slightly from the suggested rice cooker instructions and be looking at overall ratios of water to rice. So, while the rice measuring cup is important if you’re using your rice cooker for all the other times you are making rice, it’s not quite as crucial for making sushi rice at home.  Yes, I just wasted your time.

Rice Cooker

Look – I get it. Your kitchen is full of appliances and your cabinets are full of even more of them. The coffee maker, sandwich press, slow cooker, blender, grinder, peeler, juicer and slicer all take up room and cost money. But… there is no better way to consistently control temperature, time, humidity and pressure when cooking sushi rice than to use a rice cooker.

You can get them for fairly low cost these days and it really is going to make a world of difference to this whole experience of making sushi at home. Yes, you can use a pot and fiddle with the amount of water, the perfect temperature to set your stove to, the perfect way to fit the lid to keep steam in or let it out… but, no, I am not going to outline how to best do that here. We are all about easy and repeatable results around here folks. Get yourself a rice cooker and toss some other appliance taking room at the back of your cabinet if you must. Come on, you’re not juicing celery root and wheat grass for breakfast anymore anyway.

Paddle

After our rice is cooked we’re going to have to mix it to incorporate the sushi rice (more on that in a future post) and to help cool it down. While doing this it is very important to take care not to crush the individual rice grains nor mash them together. To do this sushi chefs use a slicing and folding technique that has been perfected over hundreds of years (again, in a post to follow.) The easiest way to do this is with a simple kitchen paddle. Not a spoon, not a ladle – a wooden or plastic paddle. Don’t fight history.

Wide Wooden Bowl

The bowl that the sushi gets prepared in after it has cooked needs to be fairly wide and wooden. The width allows for the maximum surface area meaning that more of your rice can be exposed to the air and cooled at once. The wood will help whisk moisture and heat away from the rice which is also critical at this stage when the sushi vinegar is added.

Fan

Immediately after incorporating the rice vinegar into the rice we’re going to want to cool it to around body temperature. If you’d like to use a hand-held fan that is dandy. I’ve grabbed a counter-top fan that I use on Low setting to do the job. It keeps my hands free to keep an eye on my slicing and folding technique. It’s up to you which you’d prefer to use. One caveat when using an electric fan: you’ve got to keep a close eye on your rice temperature as you don’t want to cool it too much!

Now that we’ve got all the right materials on hand we’re ready to get cooking!