The Sushi Tails: Materials
If we’re going full steam ahead (pun intended) with this idea of making sushi at home we’ve got to make sure there are some basic items on hand. You can certainly make use of whatever you’ve got on hand so long as it’ll do the job. For example, a two-pocket school portfolio makes a wonderful fan in a pinch.
So here are the basics of what you’ll need:
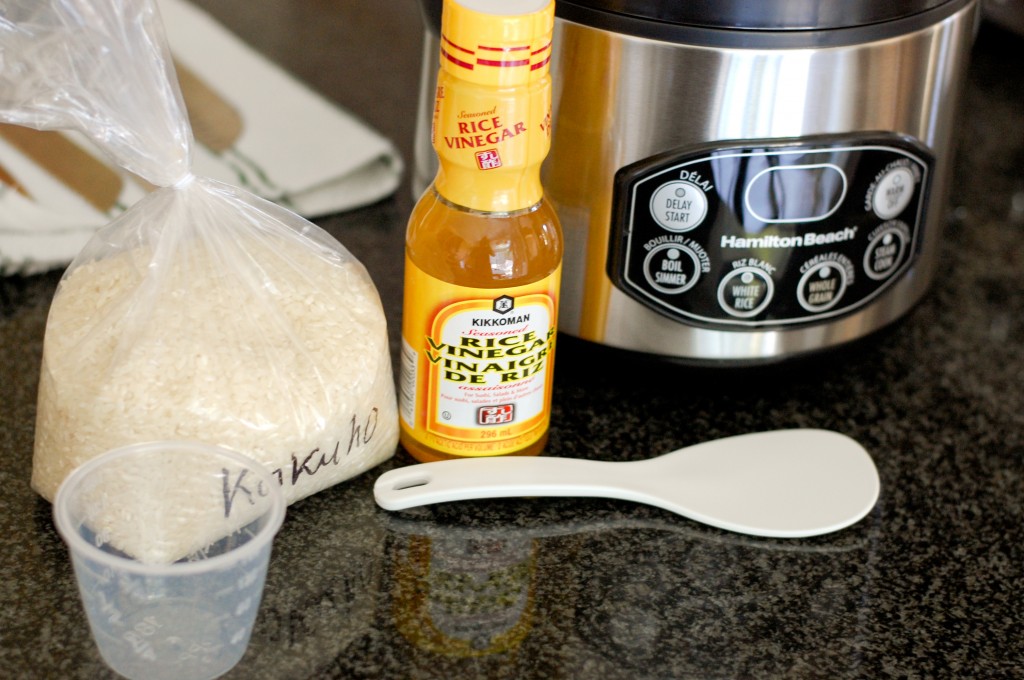
Rice Measuring Cup
If you’re using a rice cooker odds are it came with a rice measuring cup, but to clarify – rice has its own standardized measuring system and any other measuring tools you have in your kitchen may say one cup on them… but they don’t mean one cup of rice. Its believed the original measurment is based on the size of a Japanese sake bottle which is clearly not the same as a standard kitchen measuring cup. That’s really important if you’ve got a rice cooker as many of them have lines to mark how much water to pour in to the cooker that correspond to the number of “cups” of rice you add.
That being said, I believe the end result of this month-long rice experiment is that we are going to veer slightly from the suggested rice cooker instructions and be looking at overall ratios of water to rice. So, while the rice measuring cup is important if you’re using your rice cooker for all the other times you are making rice, it’s not quite as crucial for making sushi rice at home. Yes, I just wasted your time.
Rice Cooker
Look – I get it. Your kitchen is full of appliances and your cabinets are full of even more of them. The coffee maker, sandwich press, slow cooker, blender, grinder, peeler, juicer and slicer all take up room and cost money. But… there is no better way to consistently control temperature, time, humidity and pressure when cooking sushi rice than to use a rice cooker.
You can get them for fairly low cost these days and it really is going to make a world of difference to this whole experience of making sushi at home. Yes, you can use a pot and fiddle with the amount of water, the perfect temperature to set your stove to, the perfect way to fit the lid to keep steam in or let it out… but, no, I am not going to outline how to best do that here. We are all about easy and repeatable results around here folks. Get yourself a rice cooker and toss some other appliance taking room at the back of your cabinet if you must. Come on, you’re not juicing celery root and wheat grass for breakfast anymore anyway.
Paddle
After our rice is cooked we’re going to have to mix it to incorporate the sushi rice (more on that in a future post) and to help cool it down. While doing this it is very important to take care not to crush the individual rice grains nor mash them together. To do this sushi chefs use a slicing and folding technique that has been perfected over hundreds of years (again, in a post to follow.) The easiest way to do this is with a simple kitchen paddle. Not a spoon, not a ladle – a wooden or plastic paddle. Don’t fight history.
Wide Wooden Bowl
The bowl that the sushi gets prepared in after it has cooked needs to be fairly wide and wooden. The width allows for the maximum surface area meaning that more of your rice can be exposed to the air and cooled at once. The wood will help whisk moisture and heat away from the rice which is also critical at this stage when the sushi vinegar is added.
Fan
Immediately after incorporating the rice vinegar into the rice we’re going to want to cool it to around body temperature. If you’d like to use a hand-held fan that is dandy. I’ve grabbed a counter-top fan that I use on Low setting to do the job. It keeps my hands free to keep an eye on my slicing and folding technique. It’s up to you which you’d prefer to use. One caveat when using an electric fan: you’ve got to keep a close eye on your rice temperature as you don’t want to cool it too much!
Now that we’ve got all the right materials on hand we’re ready to get cooking!
Filed under: Method on October 6th, 2013


